
In this activity, which links closely to the National Curriculum for Design and Technology, we show children how to make a chicken hand puppet using simple sewing techniques – the perfect activity to keep them busy at home while teaching some technology skills!
What you need:
- Puppet templates (body template, face template)
- Felt in a range of colours (your chicken can be any colour you like!)
- Pins
- Cotton thread
- A needle
- Scissors
- Feathers and buttons to decorate (optional)
- Glue (optional)
What to do:
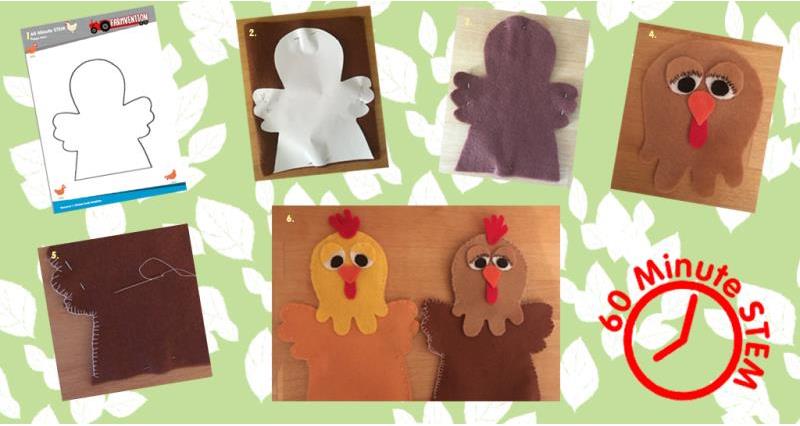
- Draw and label your puppet design. Remember to label where you will add decoration and which type of stitching you wish to use.
- Print and cut out the puppet template pieces (body template, face template).
- Pin your template to your felt sheet.
- Draw around the template and onto the felt sheet.
- Carefully, cut out the felt shapes. Remember to cut out the body piece twice so you have a front and a back for your puppet.
- Thread the needle with the cotton (ask an adult for help!)
- Sew or glue the smaller pieces of felt onto one of the head piece to make your chicken’s eyes, beak, wattle and comb.
- Pin your head piece, front of body and back of body pieces together.
- Use running stitch or blanket stitch to sew the three pieces of felt together. Don’t forget to leave the bottom open so you can use it as a puppet!
- Tie a knot at the end of your thread.
- Decorate your puppet pal!
Let’s talk technology
Look at your puppet pal. Does it look like your original design or did you decide to make some changes as you went along? Did you use running or blanket stitch or a mixture of both? Can you fit your hand inside to make your puppet move? What would you do differently next time?
We’d love to see your designs – send a photo to letstalkfarming@nfu.org.uk